Hammering 101 cont.

Hammering Strategy - Fix the hollow section by smoothing out the curvature of the profile near the bell and addressing any tension discrepancies. Add tension and more consistent tension pathways to and between the bridge and upper bow to help integrate the bell and add some extra highs to the wash. Increase the profile with a nice smooth curvature from bridge to edge, to raise tessitura, increase stick definition, dry the wash and help accentuate some mid to mid highs in the wash. Hammer in a slight down-turned edge flange, again to slightly dry the wash without sacrificing tone or spread. Keep edge slightly looser than middle bow to give good stick definition and facilitate nice edge and shank crashes that won’t build up too much and overpower the stick sound. The down-turned and slightly looser edge flange also helps to add some low frequencies to the spread and wash.
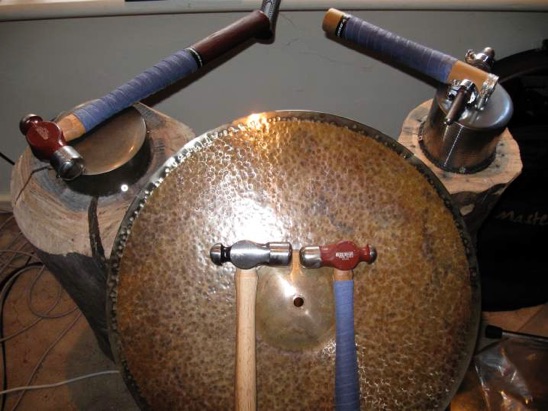
Hammering Method - With a medium weight and face circumference hammer, I hammered the hollow section and bridge for shape first, by mainly bottom hammering and some top hammering to add tension and help hold the shape.
I also started on the edge flange in the same session again with predominantly bottom hammering around the entire circumference, following two lines I’d marked with a draftsman compass and sharpie at radii about 1/2” apart. I helped fix the shape at the same time by adjusting the intensity of the hammering at the mis-shaped lower edge point and with additional top hammering around the same area.
After a rest I used a heavier, flatter faced hammer to add consistent tension pathways top and bottom, from the bridge to the edge, checking the shape and tonal variations (by tapping with a stick) as I went.
Another rest and then a round of hammering top and bottom with a smaller hammer, focussing on the tension strategy explained earlier. The smaller hammer is essentially adding another more refined ‘layer’ to the hammering strategy and helps with fine tuning the tension zones. Some extra fine tuning and a little tension adjustment from bottom hammering finished the session.
21” Jazz Ride Chronicle -
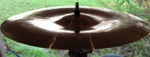
This is my favourite fully lathed jazz ride and before the re-creation featured a very low profile and a hollow section near the bell.
My original notes on the cymbal were - ‘large hollow section (sounds like hitting a piece of pvc piping) near the bell which permeates the wash, a few conflicting tones in the mid low register, very low tessitura, lacks stick definition and clarity, low overall tension, bell sound separate from rest of cymbal, highs somewhat lacking in the spread of the wash, poor shape - a 6 inch section of the edge dips about 1/2 an inch below horizontal’.
mp3 of the 21 Jazz Special
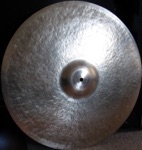
Profile photo after modification
The Reverse China Chronicle -
The 12” reverse china below was created from a light splash.
The first round of hammering was executed with a flat faced hammer in a pattern of tight radial spokes around the entire circumference, on the top and bottom of the cymbal. Uniformity in pattern and impact pressure was a major consideration.
The strategy was to create an even and well tensioned base for future hammering. This cymbal was originally shaped by hand hammering and this was a major consideration in the reasoning behind the first hammering round.
I drew a guide line with a sharpie and a draftsman’s compass on the bottom of the cymbal about an inch in from the edge. The guide line was at the point where I wanted the highest peak of the edge flange.
I also drew a number of guide lines of increasing radii (roughly an eighth of an inch), emanating from the bridge on the top of the cymbal.
I hammered around the bottom guide line a number of times, until I could see the edge turning down. I made sure the flange was even and hammered on the guide line a little more at the points where I wanted to increase the angle of the flange.
Then I hammered around the guide lines on the top of cymbal, starting at the bridge and working my way into the bow area. Eventually the section of the bow that was hammered, inverted and the resultant tension pulled the edge in slightly and formed the final edge flange. The profile was formed.
The final round of hammering was applied to the top of all of the convex areas of the profile. This required hammering from both the top and bottom of the cymbal. This added some overall tension and ‘locked’ the shape in place. Some fine tuning for shape, tension and any overly dominant frequencies in the spread, finished the project.
Before & after soundfile of the above modification